Using the HeliumDev Client and Deploying Apps


Running the HeliumDev Client

This section assumes that you have already downloaded the HeliumDev client and Java JDK as described here.

Using the command line, navigate to the directory containing the HeliumDev client jar. This is similar for Windows, Linux and macOS operating systems. Run the jar with Java as follows:

java -jar HeliumDev-app-1.7.3-jar-with-dependencies.jar

Note that the version number, 1.7.3 in this case, might be different on the HeliumDev client that you have downloaded. This is to be expected as the version number changes with each official Helium release. The Helium release schedule and release notes are maintained on the Helium Releases page.

After starting the HeliumDev client you should see the following output:

Welcome to the Helium development tool. Use "exit" or "quit" to exit and "help" for online help
he-dev>


Using the Help Functionality

The HeliumDev client also provides help functionality. To make use of this use the help command:

he-dev> help

This will produce the output listing the available commands:

This tool accepts the following commands:
app                         Manages applications
build                       Builds the active project and prints all warnings and errors encountered 
                            during the build process
build <project name>        Builds the project with the specified project name and prints all warnings 
                            and errors encountered during the build process
exit                        Exits from this tool
help                        Displays this help message
help <command>              Displays a detailed help message for the specified command
get                         Gets an environment variable's value for this tool
new-sandbox                 Sets a new UUID that will be used when running this project.  The effect of
                            using a new UUID will be that a new "sandboxed" instance will be created on
                            the target server with a new dataset.
mood                        Gets the current mood of the HeliumDev tool
pin                         Change the PIN for the current session
project                     Manages projects
release                     Releases a new version of the active project to the active target server.
                            Only successfully built projects will be released.
release <project name>      Releases the project with the specified project name to the active targer
                            server.  Only successfully built projects will be released.
run                         Builds the active project and deploys a "sandboxed" instance to the active 
                            target server.  Only successfully built projects will be deployed.
run <project name>          Builds the project with the specified project name and deploys a "sandboxed" 
                            instance to the active target server.  Only successfully built projects will 
                            be deployed.
server                      Manages target server environments
set                         Sets an environment variable for this tool
timer-disable               Disables timing of commands
timer-enable                Enables timing of commands
generate                    Builds code from models
lang                        Tools for project translation file
quit                        Exists from this tool

For more help with a specific command try the help command followed by the command name for which help is required. To display help for the get command for example:

he-dev> help get

This will produce the following output:

Gets the value(s) of an existing environment variable(s) for this context.
Usage: get <variable name>
<variable name>             The name of the environment variable.
Run the "get" command without any arguments to see a complete list of set variable values for this context.
Run the "set" command without any arguments to see a complete list of available variable names 
and descriptions.


Setting the Server Details

The following commands need to be executed to configure the server details with the HeliumDev client. The expected output is also shown. Note that all examples in this tutorial that references the development server environment makes use of https://dev.mezzanineware.com for demonstration purposes. If you are using a different server, you will need to substitute this with the appropriate URL. The list of available development servers can be found here.

Server name and url
he-dev> set server=dev
The value for the variable "server" was successfully set to "dev" in the current context
The last command completed in 0.00 seconds

he-dev> server set uri=https://dev.mezzanineware.com
The value for the variable "uri" was successfully set to "https://dev.mezzanineware.com" in the current context
The last command completed in 0.00 seconds

Note the username and password referenced in the snippet below. This refers to the API credentials. If you have not yet requested API credentials please refer to the Required Credentials section of this document. For now let's assume the username of "usrname". If a pin has not previously been specified, one will need to be specified now.

Server credentials
he-dev> server set user=usrname
The value for the variable "user" was successfully set to "usrname" in the current context
The last command completed in 0.00 seconds

he-dev> server password
Please enter your PIN: he-dev> ****
Please enter your password for the server dev: he-dev> ********
Your password for the server dev has been set
The last command completed in 11.84 seconds


Be sure when setting values in the HeliumDev client that there are no trailing spaces or other characters. This might result errors.

Note that all instructions in this tutorial assumes the use of the Helium development server located at https://dev.mezzanineware.com. If you are using a different server, substitute this with the appropriate URL.

Setting the User Mobile Number

In order to be invited to newly deployed apps you also need to set your mobile number as part of the HeliumDev client configuration. This should be the same number as used when registering on Helium.

he-dev> set mobileNumber=278212345678
The value for the variable "mobileNumber" was successfully set to "278212345678" in the current context
The last command completed in 0.00 seconds


Setting the Project Details

In order to deploy apps, the HeliumDev client needs to be configuration with a name and source code location of your project. It also needs to know for which roles you will need to be invited when deploying snapshot instances of the app.

he-dev> set project=Helium Tutorial
The value for the variable "project" was successfully set to "Helium Tutorial" in the current context
The last command completed in 0.00 seconds
 
he-dev> project set roles=System Admin
The value for the variable "roles" was successfully set to "System Admin" in the current context
The last command completed in 0.00 seconds

he-dev> project set dir=/workspace/helium-tut
The value for the variable "dir" was successfully set to "/workspace/helium-tut" in the current context
The last command completed in 0.00 seconds
 
he-dev> project set releaseGroup=Tutorials
The value for the variable "releaseGroup" was successfully set to "Tutorials" in the current context
The last command completed in 0.00 seconds


Debug Mode

If debug mode is enabled while building an application, warnings will be generated if certain elements in the source code are not being used. These include model objects, attributes, functions and views.

In addition to this, debug mode will, in some cases, also print additional stack traces when an unexpected error occurs.

Debug mode can be enabled as follows:

he-dev> set debug=true
The value for the variable "debug" was successfully set to "true" in the current context
The last command completed in 0.00 seconds

Secondary Lang Warnings

If a secondary lang file is used in the app, optional warnings can be toggled in the HeliumDev client to indicate which entries are in en.lang but not included / translated in any secondary lang files:

he-dev> set secondaryLangWarn=true
The value for the variable "secondaryLangWarn" was successfully set to "true" in the current context
The last command completed in 0.00 seconds

Verbose Mode

The verbose mode is currently only applicable to 'build' and 'test' commands, reducing and minimizing the output of the dev client for a simpler look. It is more aimed towards users of the "No UI" client, but can still be set in the "UI" client similarly to the 'debug' mode. The verbose mode defaults to true, outputting verbose messages as most users are used to. This mode is only available from version 1.28 of the dev client: 1.28 Release Notes

It can be disabled as follows:

he-dev> set verbose=false
The value for the variable "verbose" was successfully set to "false" in the current context
The last command completed in 0.00 seconds

Test Mode

A runTests flag has been added to allow unit tests to be run when using any of the 'build'/'run'/'release' commands. It defaults to false, but when set to true all of the application's @Test annotated functions will be run first and return any failed messages as described here. This mode is only available from version 1.31 of the dev client: 1.31 Release Notes

It can be enabled as follows:

he-dev> set runTests=true
The value for the variable "testApp" was successfully set to "true" in the current context
The last command completed in 0.00 seconds


Deploying a Snapshot App

To deploy a snapshot app simply use the run command:

he-dev> run
Loading source files...
Compiling the application...
The project "Helium Tutorial" compiled successfully
Deploying a sandboxed instance of "Helium Tutorial" to the "dev" server
Loading source files...
Publishing a new release of "Helium Tutorial" to the "dev" server
A sandboxed instance of "Helium Tutorial" has been deployed to "dev".  You can access this instance at:
https://dev.mezzanineware.com/web-client/app?appId=edc48c58-f858-4938-8d57-3b19587a4abe&roleName=System+Admin

If you are developing on a Mac system, a browser window (your default browser) will open, taking you immediately to the instance URL provided. This is the default behaviour of the Dev Client, but can be toggled by changing the global variable 'openBrowser'. This boolean variable can be set in a similar fashion to the 'debug' or 'verbose' variables where true will open a browser window, and false will not.

he-dev> set openBrowser=false
The value for the variable "openBrowser" was successfully set to "false" in the current context
The last command completed in 0.00 seconds


Forcing Deployment of a Snapshot to a Clean Database Schema

Each time the run command is used for the same app, the same schema is used. App data and user invitations are therefore retained. To force a new empty schema the new-sandbox command can be used:

he-dev> new-sandbox


Longevity of Snapshot Apps

During development it's possible that many different snapshot app deployments are made to the Helium server. As a basic housekeeping task and to ensure that resources are managed optimally for all who use the server, Helium will periodically purge existing snapshot apps automatically. This means that the app is deleted from the Helium server along with any data associated with it. Snapshot app deployments older that 14 days are deleted from the server every night.

Snapshot app deployments should therefore not be used for any purpose where the deployed app or the associated data is to be needed for longer that 14 days after deployment. Note that if a deployed app is purged by Helium and an attempt is made to use the run command from the HeliumDev client for that same app , an error might occur. This is because the HeliumDev client is not aware of the fact that the app has been purged and attempts to simply upgrade the currently deployed app when it is, in fact, not available anymore. To remedy this, simply use the new-sandbox command as shown in the previous section. This will force a new app deployment.


Note that snapshot app deployments that are older that 14 days are automatically purged from the Helium server.

Releasing Non-Snapshot Apps

Snapshot deployments are suitable for testing apps during development. Helium, however, regularly clears out snapshot apps and their related schemas as part of an automatic cleanup mechanism. For apps, used for longer term testing and, amongst others, production purposes a different process of deployment should be used. This steps to achieve this follows.

Firstly the app source needs to be release to the server using the release command in the HeliumDev client. During this you will be prompted for your pin, as specified earlier, a name for the release, an optional description for the release and a release group for the release to belong to. Note that if the "releaseGroup" variable was set for your project, this will be available as the default release group. The default value can then be used, or a different release group can be specified.

he-dev> release
Please enter your PIN: he-dev> *********
Loading source files...
Compiling the application...
The project "helium-tut" compiled successfully
Release name: Helium Tut Release 2
Release description: Helium Tut Release 2
The default release group for the "Helium Tutorial" project is "Tutorials"
Use this release group? (yes/no) no
Release group: Instructionals
Loading source files...
Publishing a new release of "helium-tut" to the "localhost" server
An official release of "helium-tut" has been published to "localhost".
The last command completed in 38.03 seconds

Please note the Release Name cannot exceed 50 characters


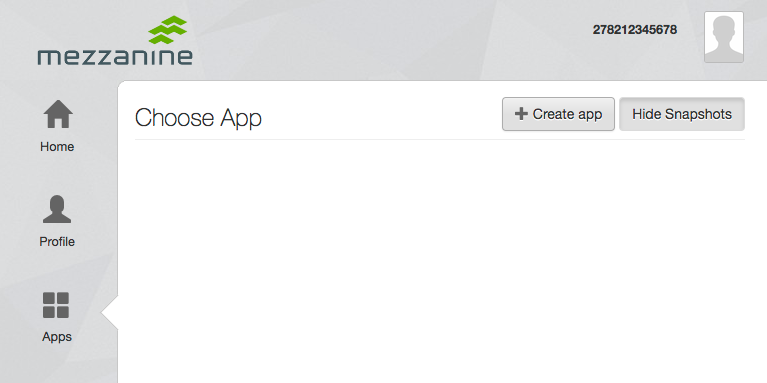
The next step is to create an app using the Helium core app. To do this open a browser and navigate to the Helium url that was provided. Select the "Apps" menu item and click on "Create app".


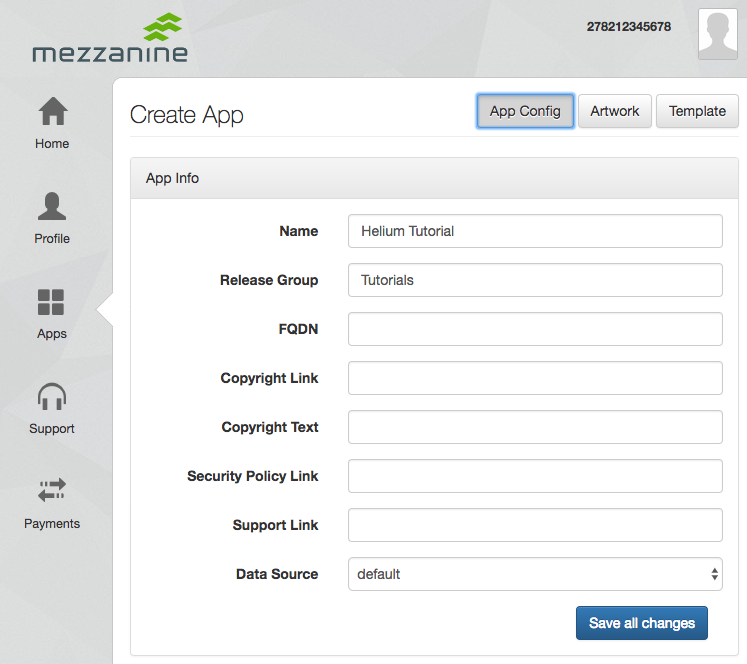
Fill in the app details and upload the app artwork as needed. The only compulsory data fields for the app is "Name", "Release Group", and "Data Source". 

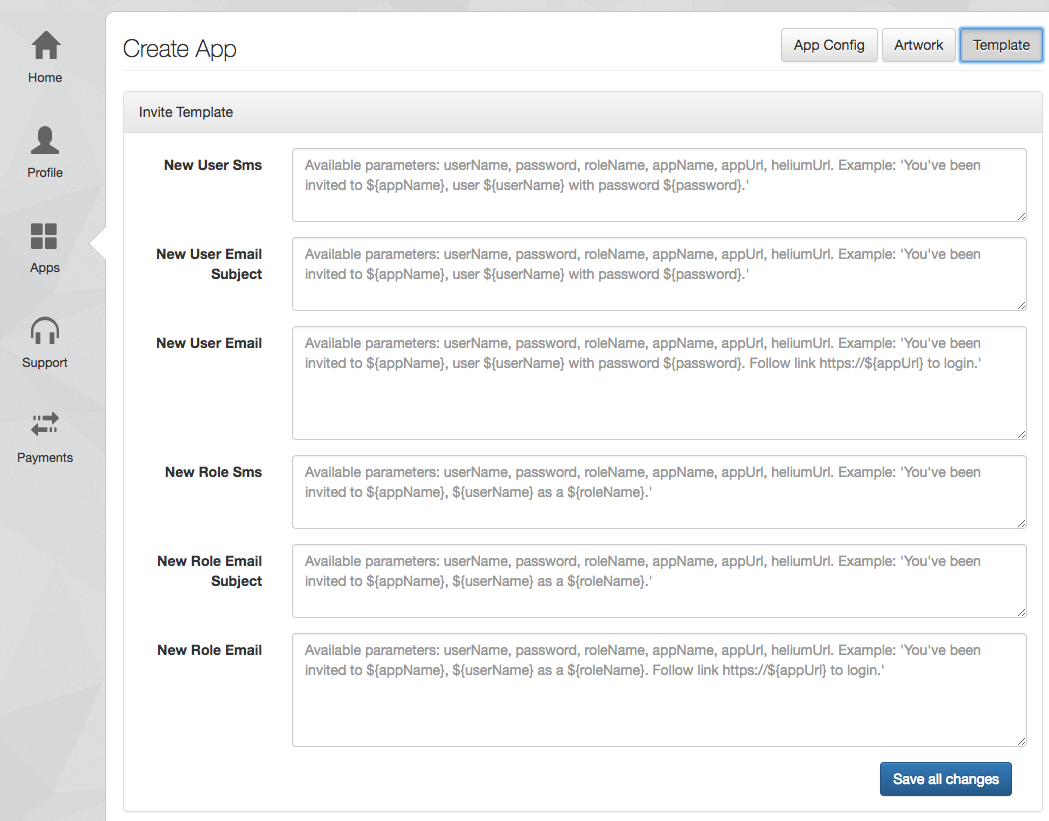
In addition to the standard app fields and artwork, invitation message templates represent templates for e-mail and SMS messages sent to newly invited users or existing users that are invited to new app roles. These can be edited under the "Template" tab. The text areas for these fields contain place marker text by default to list the available parameters and to show an example of their usage. More information on invite messages templates can be found here.

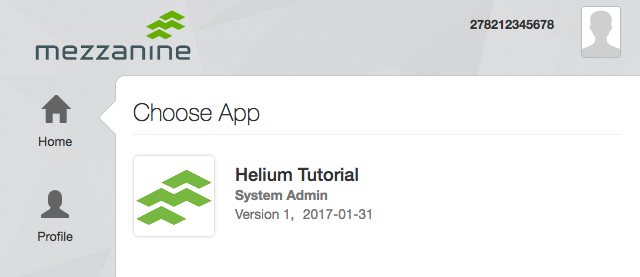
Once the new app has been saved it will appear under the list of apps.


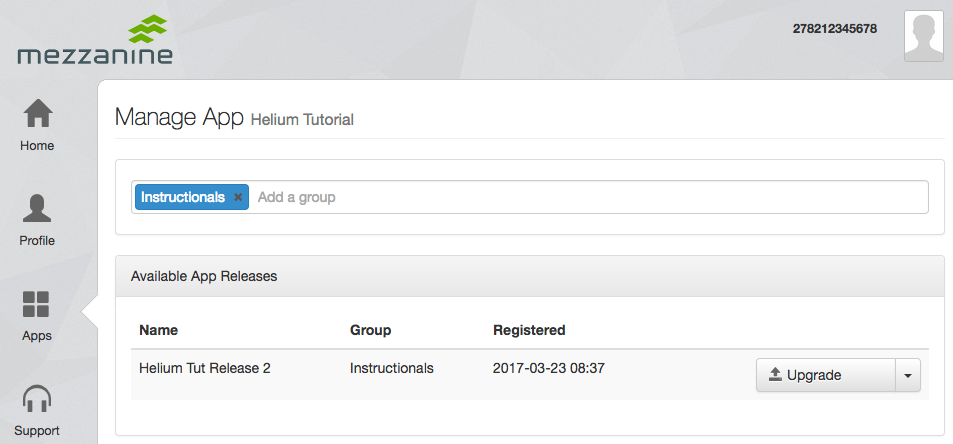
In order to deploy your released source code for the new app, select to "Upgrade" row action. Once selected you will be able to search for your release. This is done by specifying tags for the release group. In this case we used "Instructionals" as the group name. Note that multiple tags can be used at once for searching. Once the release has been located, the "Upgrade" button can be used the upgrade the app to the selected source code release.

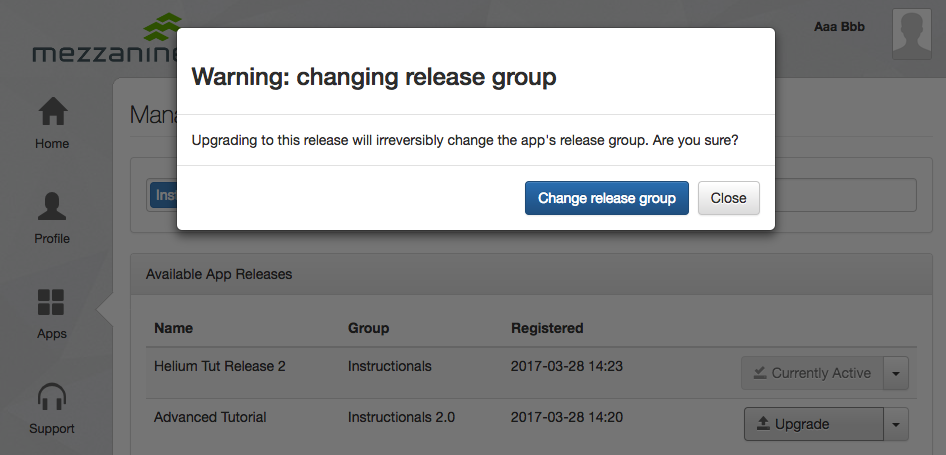
To prevent an accidental upgrade to the wrong release, specifically one belonging to another release group, you'll see the following warning pop-up if you select a release with a group name different than that of the app you're upgrading:


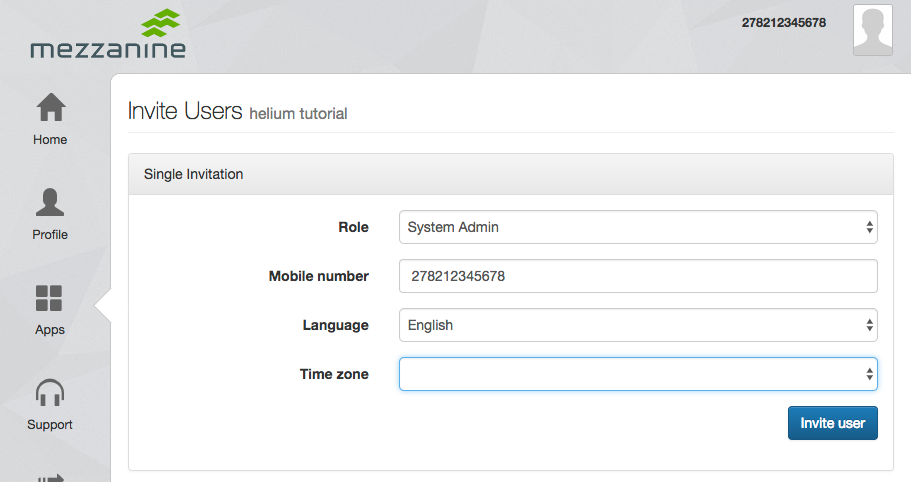
On the confirmation page tick the disclaimer message and click the button labeled "Upgrade". Your source code release has now been deployed for the app. The next step is to invite yourself to the app. To do this, click the "Invite" row action for your app. Complete the form and click the "Invite user" button. Value for the "Role" and "Mobile number" fields are required in order to proceed. Note that you can invite yourself to the app for additional roles by repeating the process and selecting a different value for "Role". This will only work if the application source code includes an invite user function for that specific role. This is discussed here.


Once invited you should see the app on your Home view.


Troubleshooting

We do our best to include enough helpful hints in the HeliumDev client itself to guide you in correcting any missing or malformed configuration details or credentials. If, however, you're confronted with an error you cannot diagnose, please see the suggested steps below.


 'run' or 'release' command returns "500 Internal Server Error"

Suggested Steps

  1. Make sure you are using the latest version of the HeliumDev client. Often the latest version of Helium on the server requires you to use the latest client version as well. You can see your current client version in the jar filename, or on the first output line when running the application, and the latest released client version can be found here.
  2. If the app in question is a snapshot version, uploaded with the 'run' command, run 'new-sandbox' to create a new instance.*
  3. Delete your HeliumDev client's config file, found at ~/.he-dev/config. The client will recreate this file. Please note you will need to re-enter your credentials and your project and server information before being able to build and release again.*
  4. Contact Support, noting which of the above steps were taken, and what the results were. Please also include, at minimum, the server and the time the error occurred.**

*Please note that steps 2 and 3 are potential workaround steps. It should not be necessary to recreate snapshots or reset your config on a regular basis. If, for example, you find yourself needing to do so with every release to the server, please contact Support.

**For internal Mezzanine developers, create a JIRA ticket on the HE project. The ticket type should be "Support Request". For external PaaS client developers, send an e-mail with your request to Mezzanine Support at support@mezzanineware.com.

Generate Features

As of version 1.28 of the Helium DevClient, an improved implementation of the generate features are available which can be used to speed up some processes of development. You can find more information regarding these features here.